Quickstart Tutorial: Set up Real Actuator and connect via USB
Follow this tutorial for the fastest way to set up a PULSAR actuator out of the box connected via USB, you will then be able to get it running in no time with the PULSAR HRI Desktop App next.
🧰 What You’ll Need
Usually provided by PULSAR HRI:
- 1x PULSAR HRI actuator
- 1x Power Bus Cable (more details here)
- 1x standard USB-A to USB-C cable
Usually NOT provided by PULSAR HRI:
- A mechanical support and screws to secure the actuator (more details and some designs you can 3D-print here)
- A 48V Power Supply Unit (more details here)
- A Computer
👣 Step-By-Step Guide
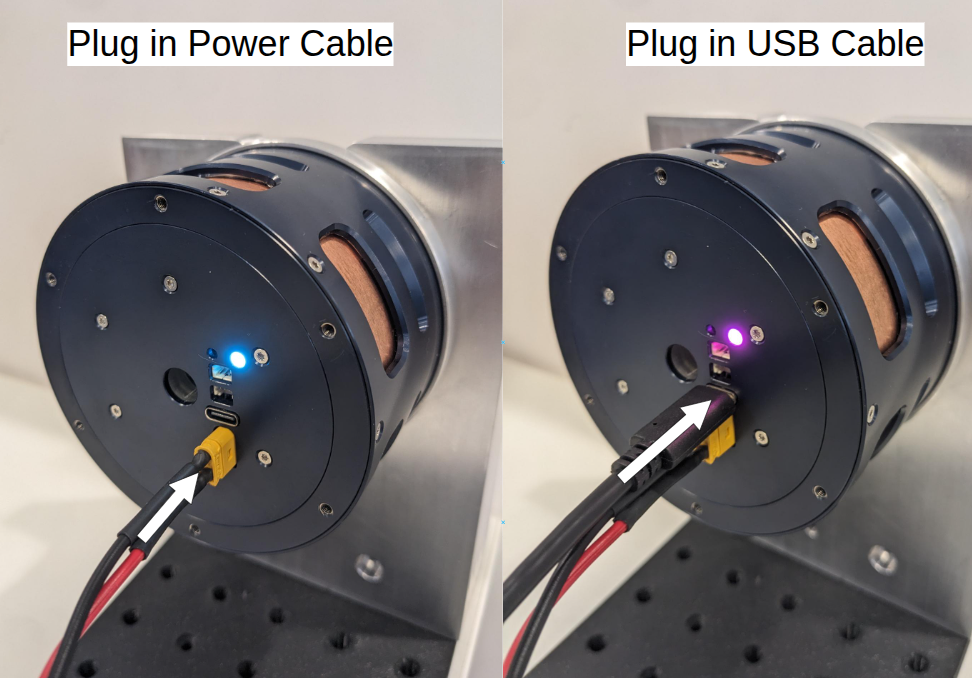
- Connect the the Power Bus Cable to the Power Supply Unit, plug it into the actuator.
- Activate the Power Supply Unit to power the actuator on, see the actuator status led switch on
- Plug the USB-C cable into your computer, and then into the actuator USB connector, the actuator status led will change colour
Success
Your actuator is now connected! Move to the next Quickstart Tutorial: No-Code Desktop App for Real Actuator to get it to run in minutes!
Question
Need help or something doesn’t work? Head over to the Support page: we’ve got your back.