Quickstart Tutorial: Set Up Real Actuator and Connect via USB
Follow this tutorial for the fastest way to set up a PULSAR actuator out of the box and connect it via USB. It intentionally combines only the minimum power and USB steps needed before launching the PULSAR App no-code GUI.
For more detailed mechanical mounting, power, USB, and CAN background, see Set Up Real Actuators and Communicate with Real Actuators.
🧰 What You’ll Need
Usually provided by PULSAR HRI:
- 1x PULSAR HRI actuator
- 1x Power Bus Cable (more details here)
- 1x standard USB-A to USB-C cable
Usually not provided by PULSAR HRI:
- A mechanical support and screws to secure the actuator (more details and some 3D-printable designs here)
- A 48 V Power Supply Unit (more details here)
- A computer
Operating system compatibility
Currently, the ecosystem is mainly compatible with and tested on Windows and Ubuntu Linux.
👣 Step-by-Step Guide
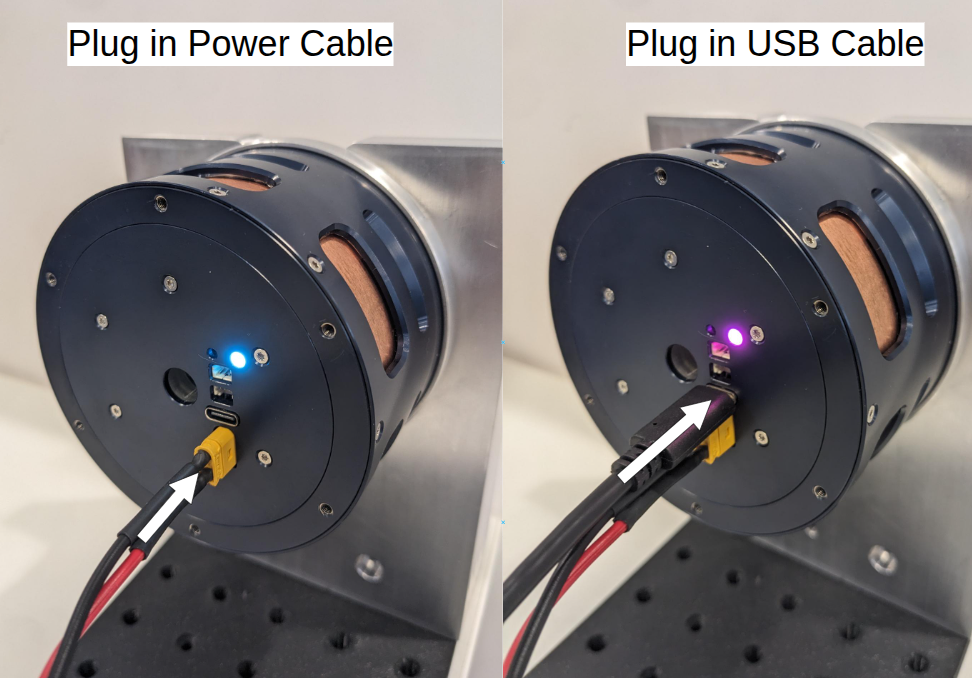
- Connect the Power Bus Cable to the Power Supply Unit, then plug it into the actuator.
- Turn on the Power Supply Unit to power the actuator. Check that the actuator status LED turns on.
- Plug the USB-C cable into your computer, then connect it to the actuator USB connector. The actuator status LED will change color.
Success
Your actuator is now connected! Move to the next Quickstart Tutorial: No-Code GUI for a Real Actuator to get it running in minutes!
Question
Need help, or is something not working? Head over to the Support page: we’ve got your back.